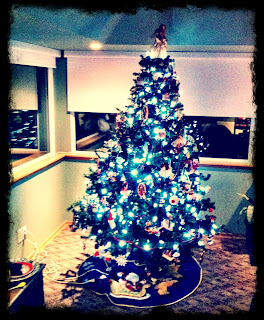
December 22, 2012

Our List of Waiting Room Essentials

Emmy and I spent the morning in the doctor's office waiting room during their "After Hours Clinic" since she was awake for a large majority of the night last night crying and telling me that her ear hurt. That darned right ear. It's always the right one. I think a visit to an ENT (Ear, Nose + Throat) Doctor may be in our future next Spring.

We have learned, through multiple visits to the doctor and the urgent care centre, that we need to come armed with a few essential things to make our wait a little less painful for us AND for the other people in the waiting room. Here's what we pack in our bag when we know we're going to have to wait for an hour...or two, or three, or even sometimes four:

1. A snack.
I always make sure to ask Emmy before we leave he house what snack she wants to ensure that we don't have a waiting room meltdown (e.g. "No, I want cheese and crackers!"). I bring a ziplock baggie to distribute the snacks in and then the whole original bag in case we are there for a long time. 

2. Reading material.

Who doesn't love Rickard Scarry!?
I love groups of small books like this - there are four books and they are each about 12 pages long. They are small so I don't have to worry about packing a whole separate bag the size of a large book. 

3. Colouring tools.
When we are out at a restaurant and get a pack of crayons, I always make sure to take them home with us and add them too our "waiting room essentials" bag. That way we aren't removing crayons from the set we use at home and losing them/worrying about losing them. I usually bring a colouring book or some scrap paper, but have also asked the receptionist is she can spare a piece or two. 
4. Flash cards.
I got this set at the Dollar Store for A DOLLAR and we love them. This one is "Beginning Words", but we have a number of them (e.g. numbers, first words, Dora themed cards, etc...all from the Dollar Store). Again, they are small and take up minimal space in my bag, but provide a LOT of entertainment and keep Emmy occupied for quite a while. 
These items work well for us and are easy enough to pull together in a few minutes so that we can get out the door in a hurry and hopefully be first in line to see the Doctor! I think this list of items would also work well to keep Emmy happy and occupied in any other setting that required a long wait, such as an airport visit.

Here's hoping that the antibiotics Emmy is on clear up this ear infection before Christmas!

December 20, 2012

Crazy for Curtains!!

Oh how I love these Roman blinds - forgive the bad iPhone/nighttime shots please!

They turned out amazing with black out fabric on the back to ensure it gets dark in Emmy's room (I'm kind of overly obsessed with it being dark for naps)!

I'm thrilled with how the fabric/pattern looks in her pink room - there are SO many fun, bold colours that no matter if we want to reprint another colour in a few years, the options are still endless!


December 11, 2012

ACHOOO

We are sick.

As of 9:03pm on December 11th, here's how we are doing:

Mummy = knee deep in the part of the "flu" where your nose becomes like a leaky faucet. I've blown my nose about 500 times today. Not kidding. Breathing through my nose is becoming impossible.

Daddy = mid-fever portion of the "flu" with the shivers and shakes (where I was on Saturday). I made him tea and let him have the sofa seat closest to the fireplace so he can warm up. Aren't I a good wife?

Emmy = on antibiotics for an ear infection. She was inconsolable last Thursday night, so Friday morning when her temp was 103.5, we went to the Hospital. I believe that's where Mummy picked up the flu and then passed it along to Daddy. BLERG. On the bright side, the doc prescribed antibiotics for the infection and her temp is back to normal and if you ask her how her ear is, she will now tell you "Gooooood" instead of "My ear hurts!". She is currently having a sleepover with Grama and Grampa (oh thank goodness we moved here)!!

We have tea in hand, meds on board and hope to wake up feeling a little better tomorrow. Fingers crossed.


December 10, 2012

For my next project...

I am finally tackling that chalk board in the kitchen.

Except that I decided to take a different approach than I had posted about previously. Originally we were going to get an oversized mirror at Ikea and paint it with the trusty rusty chalkboard paint. That was going to cost more than the budget allowed so instead, we went all in and decided to paint the wall with the chalkboard paint and frame the painted area with some wood or moulding.

Step One is complete. The wall was painted today with two coats and I think that may be all it needs. Time will tell.


I can't wait to draw a big ol' calendar on the top and list my "To Do's" and perhaps our meal plans for the week to help me stay on top of that better on the bottom.

December 6, 2012

Our DIY Nightstand Makeover

My very first DIY project (the Ikea Rast "hack") is now complete, and although it was successful, I learned some very valuable lessons, such as:

> research, research and research before you jump into a DIY project to ensure you aren't forgetting an important step
> be patient. Follow all of the instructions/directions for the products you are using, even if they take longer than you want them to

The inspiration came from here (you can find detailed instructions on how to create the end result at that link) and I'm very happy with how ours turned out.

They were relatively straightforward to customize - I bought some wood stain, white paint, foam brushes (for the white drawer fronts) and bristle brushes (for the wood stain) and applied multiple coats of each plus a final two coats of varathane to seal that puppy. The knobs are from Wal-Mart and cost only $32 for six of them. Not too shabby.


Are they perfect? Nope.

Are they pretty darned nice looking and good enough for my first DIY? Yep, they sure are.

Here's a reminder of what they looked like before the customization phase!
There is still some bedroom styling that needs to get done to make the tops of those dressers sing, but even with a few items plopped on them quickly they look GREAT! Next DIY project on the list is the chalkboard for our kitchen wall. Chalkboard paint and rollers are sitting in our foyer just waiting to get used! Woo hoo!


December 5, 2012

Sitting Pretty

After spending about an hour at Sears today with a sales associate who walked me through just about every detail possible, I finally decided which carseat would be the last carseat we ever buy for Emmy.

I had done some online research and narrowed it down to the following options:

Graco Nautilus Gavit 3-in-1 Multi-stage car seat:
What I liked about it:
> it reminds me of a captains chair, so it seems like it would be very comfy
> it has a very tall sitting height, which will be good for our long-torsoed little Lemon
> ease of recline and ease of harness height adjustment
> good safety rating
> converts to a booster and then a backless booster

What I didn't like about it:
> it's wide. If we ever (easy Mum, I'm just saying) had another baby it might be tricky to have this, another carseat AND an adult in a backseat

Diono RadianR100 Convertible+Booster:
What I liked about it:
> it has a simple installation with LATCH hooks that are similar to the ones in our Britax 
> it has a very tall sitting height like it's competition, which will be good for our long-torsoed little Lemon
> good safety rating
> the carseat sits very low on the seat of the car (because of the short base) so it's easy for Emmy to get in and out of it on her own, which we tested right there at Sears
> if we ever had another baby (seriously Mum, who knows what may happen in four years) he/she could use this carseat right out of the hospital

What I didn't like about it:
> it didn't have a drink holder (kind of a silly thing, but the other one did, so this stood out)
> moving the harness height up seems a bit more involved than it's competition even though everything I had read said that it is simple to do
> it doesn't convert to a backless booster which the lovely Sears associate said could be a problem if an older child doesn't want to sit in a "baby seat" to which I replied "She will sit where I tell her to sit!". 

I waffled back and forth, but when it came time to pull the trigger, I chose the RadianR100 and I can't wait to get it installed in our car and see what Emmy thinks! Our current seat will move to Grama and Grampa's car so we aren't constantly transferring one seat back and forth from car to car! 


December 4, 2012

In the Driver's Seat

Before we moved to Brantford, I was afraid to drive. Afraid isn't actually a strong enough word. I was terrified.

For some reason Toronto driving scared me like birthday clowns scare small children. I would get sweaty palms, nervous tummy and had a number of really good excuses lined up in the event that someone asked me to drive, such as "I had a beer at lunch so I really shouldn't get behind the wheel" or "I'll just order whatever I need online, I don't need to go out to get anything" or "My glasses aren't working today and I need them to drive". OK, so maybe they were crap excuses, but I would dish them out anyway.

This fear of driving developed when I was involved in a t-bone accident back in oh-two (2002) where I was at fault turning left at a stop light and an oncoming driver struck my passenger side. That accident happened only about 14 days after I bought my very first car and there was about $6000 worth of damage to it that took two months to fix. I lost all of my driving confidence that day and that's when I started using the excuses. The times I sat behind the wheel grew further and further apart until I'd go months and months without driving.

I'm not sure exactly what it is that changed after we moved, but I've regained my confidence behind the wheel. Perhaps it's that things move a little slower here vs in Toronto or maybe I had a bit of irrational anxiety about driving in a "big city", but either way, it feels good to "be behind the wheel" and "in the driver's seat" about where I want to go.

Sorry, no more puns.

I'm actually quite proud of myself and wanted to share this achievement just in case there is anyone else out there who frequents this blog who might have a fear they've been thinking about trying to overcome. Those who know me well probably never thought I would be a regular, confident driver again, but if i can do that, you too can conquer your fears.

Here are my wheels:


December 3, 2012

Busy little bees

We've been busy.

In no particular order, here are some things we've accomplished over the last week:

> put up the Christmas shrub...ahem, tree. Emmy got pretty excited about it and constantly asks for the "lights to sparkle Mummy?"


> made 600 peanut butter balls and dipped them in chocolate

> finally put the final coats of varathane on our dressers turned nightstands so we can put them in the Master bedroom and start using them

> helped put up and decorate Grama and Grampa's Christmas tree

> saw the new James Bond movie Skyfall with the hubs (damned that Daniel Craig is handsome...so is the hubs)
> wrapped some of Emmy's presents and put them under the tree. Taught Emmy that we don't open anything until Christmas Eve after she immediately ran to them and said "This for me? I open now?"
> ate four peanut butter balls (self props for restraining myself!!!)

It's been a good, but busy week and there is a ton that I want to get done before Christmas gets here. I think tomorrow's blog post might be a list of things we need to accomplish before Santa makes his appearance this year!

Hope you've had a great week too.
My little lemon and I on our Friday together last week. 

November 26, 2012

Love my Lemon

The past few days have been fun-filled, busy and filled with laughter and I spent some time today reflecting on just how lucky we are to have a healthy, silly, beautiful little girl in our lives.

Emmerson is our whole world and I quite honestly could talk non-stop about how amazing she is from the time my eyes open in the morning until the second I give in and conk out at night.

Although she's knee-deep in her terrible two's, and is prone to yelling/demanding/screaming when things don't go EXACTLY how she wants them, she's also learning how to share like a big girl, how to always say please when she's asking for something and to always, always, ALWAYS give Mummy a kiss when I ask for one (he he).

It amazes me when I think about what our lives were like before we were blessed with Emmy. We were happy, busy and felt fulfilled, but she has changed us all. We are better because of her. Because we all want to be better and make the world a better place for her.

I love her with every single molecule that I'm made of and it's overwhelming and magical and more amazing than I ever could have imagined.

Oh how I love this little Lemon girl. 

November 23, 2012

We have fabric!

Today was fabric sourcing day! I'm happy to report that we found curtain and bench seat cover patterns that I'm thrilled with!

Both are fun and make me smile and have lots of colours in them so even if Emmy turns against pink in the future they can stay put and work with a wide range of other paint colours.

The super wonderful and talented Wanda took it all home with her and in a few weeks will return to install them!!

November 22, 2012

Princess Emmerson's Room

Keep in mind there is lots left to do in her room, such as:
> source fabric
> have curtains and bench seat cushion made
> hang artwork
> make padded headboard 

...however she and I both love how the "pink castle" is coming along. If you ask Emmy "Do you like your room?", she will respond with "I love my pink castle" - and what better endorsement could I hope to receive that that? 

Here it is, in pictures, as of November 22nd:

Books, toys and some of our special things made it onto the built-in shelves. Still on the hunt for baskets to fit along the bottom!
That scrolled clock might be one of my all-time favourite finds!
The box on the upper shelf is a jack in the box of the scarecrow from The Wizard of Oz that my parent's gave to me when I was a little girl. How special to be able to share it with my little girl. 
If your middle name is Lemon, you kinda need to have at least ONE lemon in your room, right?
This adult sized dresser is filled to the brim with all of Emmy's clothes, and keeps her Twilight Turtle safe so that he can shine stars and the moon on her walls at bedtime. That stained glass lamp was given to Max and I as a wedding gift from my Aunt Gail and Uncle David and it fits perfectly in Emmy's room. Another stunning treasure to pass along to her. 
The room is big enough to include this cartoony table and chair set from Ikea so we can have tea parties. Behind the table is the painting Max did for Emmy when she was still the Lemon in my tummy, inspired by the artwork that hangs above Carl and Ellie's fireplace mantle in my all-time favourite movie UP!
Here is where the princess lays her head and gets her beauty sleep. 
When the room was first painted I was sure I'd made a mistake choosing such a bubble-gum shade of pink and then an even brighter pink for the stripes, but now that we are filling the room up with all of Emmy's special things, I'm tickled pink (ha ha, pun intended) with my colour choices. 

We are headed out tomorrow AM to find the perfect fabric for Emmy's curtains - can't wait to share that update and see them installed in the coming weeks!

November 21, 2012

Dressing up Ikea dressers!


It's my first DIY project on my own. No help (so far) from anyone.

I'm excited. I'm nervous I'm going to screw something up. I'm anxious to put all the pieces together and see what I've created.

For now, here's what has happened so far (in pictures, because that's always more fun):
Ikea's Rast dresser was delivered and sat in our garage for three weeks until the hubs said "I NEED a bedside table!" and I decided to bite the bullet and get to work!
I unpacked the contents of Rast box #1 and had a mini freak-out in my head. I was sure I'd never be able to figure out the Ikea instructions, because I never have much luck even when the hubs is helping. A few deep breaths later and I decided to keep going - I am raising a little girl in her terrible two's, so I SHOULD be able to assemble a dresser, right??
SUCCESS!!!! It took a whole lot longer to assemble without the hubs who speaks the language of Ikea instructions, but I DID IT!
And the drawers too - although there was a tense moment when I was sure Ikea had not included the correct side panels in the box and I contemplated taking that hammer and smashing everything into wood chips, but I persevered and got those bad boys together! Times TWO (for two dressers)!
Then the staining and painting extravaganza began. It was significantly easier than I thought it would be, just somewhat time consuming. This is the first coat. Dark stain for the base and drawer surround and white for the drawers - both need at least another coat of paint. 
We are thrilled with the colour of the dark stain, but the white drawers need at least a few more coats to ensure that the wood grain doesn't peek through. Hoping that I can be done the drawers by Friday!
Stay tuned for an update later this week/this weekend on how the unit came together (fingers crossed) and then how these cute little, unassuming dressers look in our master bedroom transformed into sophisticated, elegant nightstands!

November 19, 2012

We're seeing red!

On our sofa!

Oh how I love Ikea. Thanks to their affordable sofa covers in multiple fun colours, we were able to update our brown Karlstad (since he had seen a rough two-and-a-half years worth of baby spit up, spills and potty training incidents) and transform him into a bright red, beauty! We love what the bright red colour does for this room against the yellow on the walls and how fun it looks!

Ta da! An easy update thanks to exchangeable covers!

Love how warm and inviting and fun this room is starting to become!

So much storage! I'm in heaven!

Now I'm on the hunt for some fun pillows that will tie everything together and echo the bright, whimsical feel of the red sofa! Then we need to devise an art plan for the room and decide if we want to get an ottoman too.

Or maybe these fun poufs from West Elm:


November 18, 2012

Living it up!

Oh it feels good to get things unpacked and out on display - especially my books!

We've made a lot of progress in the living room by putting together the Billy shelves (after assembling five of them I think I could do it in my sleep), and by loading them up with all of my wonderful books that have finally been unpacked!

We still need to get a few things to add to these shelves (maybe some fun wire baskets for the bottom shelves in the centre) and probably move things around a bit so it isn't just a wall of books, but adding them to this room instantly made it feel like home and a whole lot more cozy. Next step for the shelves is to get some MDF to create a uniform top and some moulding to make it feel like a built-in!

In progress - it's a great start, but we'll need to add some trinkets and perhaps some art on the walls to bring it all together!

Some of my all-time favourite reads!


There is still SO much to do, but this house is truly starting to become our home and we LOVE it!

Add to the fact that being so close to Grama and Grampa means that Mummy and Daddy are able to have more time to themselves and have a more balanced life, and we are all very happy that we made this move. Just this morning over breakfast we were talking about how much happier Emmy is and I really do think it's because she picks up on however her Mum and Dad are feeling. If we are stressed, she becomes stressed. If we are sad, she too has a sad day. But when Mummy and Daddy are happy, lighthearted and filled with whimsey and adventure, she is too.

November 15, 2012

A window seat fit for a Princess

It's in!

The amazingly talented Tommy of Trillium Custom Woodwork in Brantford came today and installed Emmy's new window seat slash shelf unit! She will be thrilled with it since it really is fit for a princess (and she is now constantly referring to herself as a Princess!)!

Without any permanent furniture in that corner of the room, it really felt a bit awkward and barren. Add to that the fact that we really needed some functional storage in her room to house books, special mementos and pretty, princess items and I can't get over how perfect the piece ended up.

I did some research online and found a few examples on Pinterest that I loved - from there Tommy measured and started building and here we are:

Here she is! Tons of storage space and the perfect thing to frame that window and fill the awkward space in that corner of the room. 
I'm on the hunt for perfectly fitting baskets to go in those bottom cubbies. 

I can't wait to get in there and fill those shelves with all of Emmy's favourite books (she has SO many and honestly loves them all - case in point I found her asleep at nap time with a book open across her chest, but she was sound asleep).

Next up for the Princess' room is choosing fabric and having some curtains made to fit the unique sized windows and a cushion for the seat! Exciting!

November 10, 2012

Fab Finds!

I went shopping today and scored big time at Winners. I love the thrill of the hunt in stores like that where you never know what you will find!

These lamps were $49.99 a piece and will match the color palette in our master bedroom perfectly! Love the oatmeal shade and the brushed silver bases! They feel like the kind of lamps that grow ups have in their bedroom - right?

The brushed metal bases match our door knobs and fixtures nicely (it's the little details!), and the shades couldn't be more perfect for our bedroom colour palette! At $49.99 each, they were a deal-and-a-half!

I also picked up a few decorative items including this awesome but useless (functionally speaking) gem that describes exactly how I feel about this house!

Home Sweet Home is right - love the colour. Love the saying. Just love everything about this treasure that only cost me $16.99!

November 9, 2012

Making an Entrance!

We've made some great progress over the past few days and the giant pile of shoes sitting on grubby white towels at the front door has been transformed. BIG YAY!

We did, however, discover that the wall that we placed the Ikea Hemnes shoe cabinets on is not straight, and we did have to make a decision on the fly to deviate from our original plan to butt the units up together. Instead, due to the wonky wall, the units sit about 6 inches apart and have a cute little umbrella container placed in between. I really like the end result, even if it wasn't what I had originally envisioned. We haven't done much styling yet, but have plans to put a piece of artwork on a hinge to hide the security system touch pad and to mount that mirror on the wall.

Ta da! Each unit holds eight pairs of shoes.
PS: Emmy hung her own coat up in that spot. Cutie pie. 

Some of Mummy's shoes!

That cute little umbrella container is a ceramic pair of wellies - a gift from my Aunt!

I LOVE my Ikea tray that holds whatever is in my pockets when I come home. I love the fun colours and the playful feel of it!

This one-of-a-kind bowl holds about six sets of keys! 
There is still a ton to do in our foyer area, including hanging coat hooks, choosing art for the wall and getting a few baskets for under the red bench that is on the other wall. More pics to come!

Feels good to get this checked off the list, especially since each of these units took nearly an hour to put together and had 25 steps to the instructions. Nutso!